
Thermal stress, edge damage, and glass-breakage risk during restoration
Inspect edge strength, glass construction, shade, heat sources, framing, and support before polishing, then control temperature, force, water, and fallout while recognizing that restoration cannot repair a weakened edge.
A sound-looking pane can have a weak edge
Glass breakage during restoration is rarely explained by the polishing pad alone. The lite may already have a concealed edge chip, frame contact, uneven solar heating, damaged coating, tight setting block, crack, or history of impact. Restoration adds local heat, force, vibration, water, access loads, and time at the surface. The combination matters.
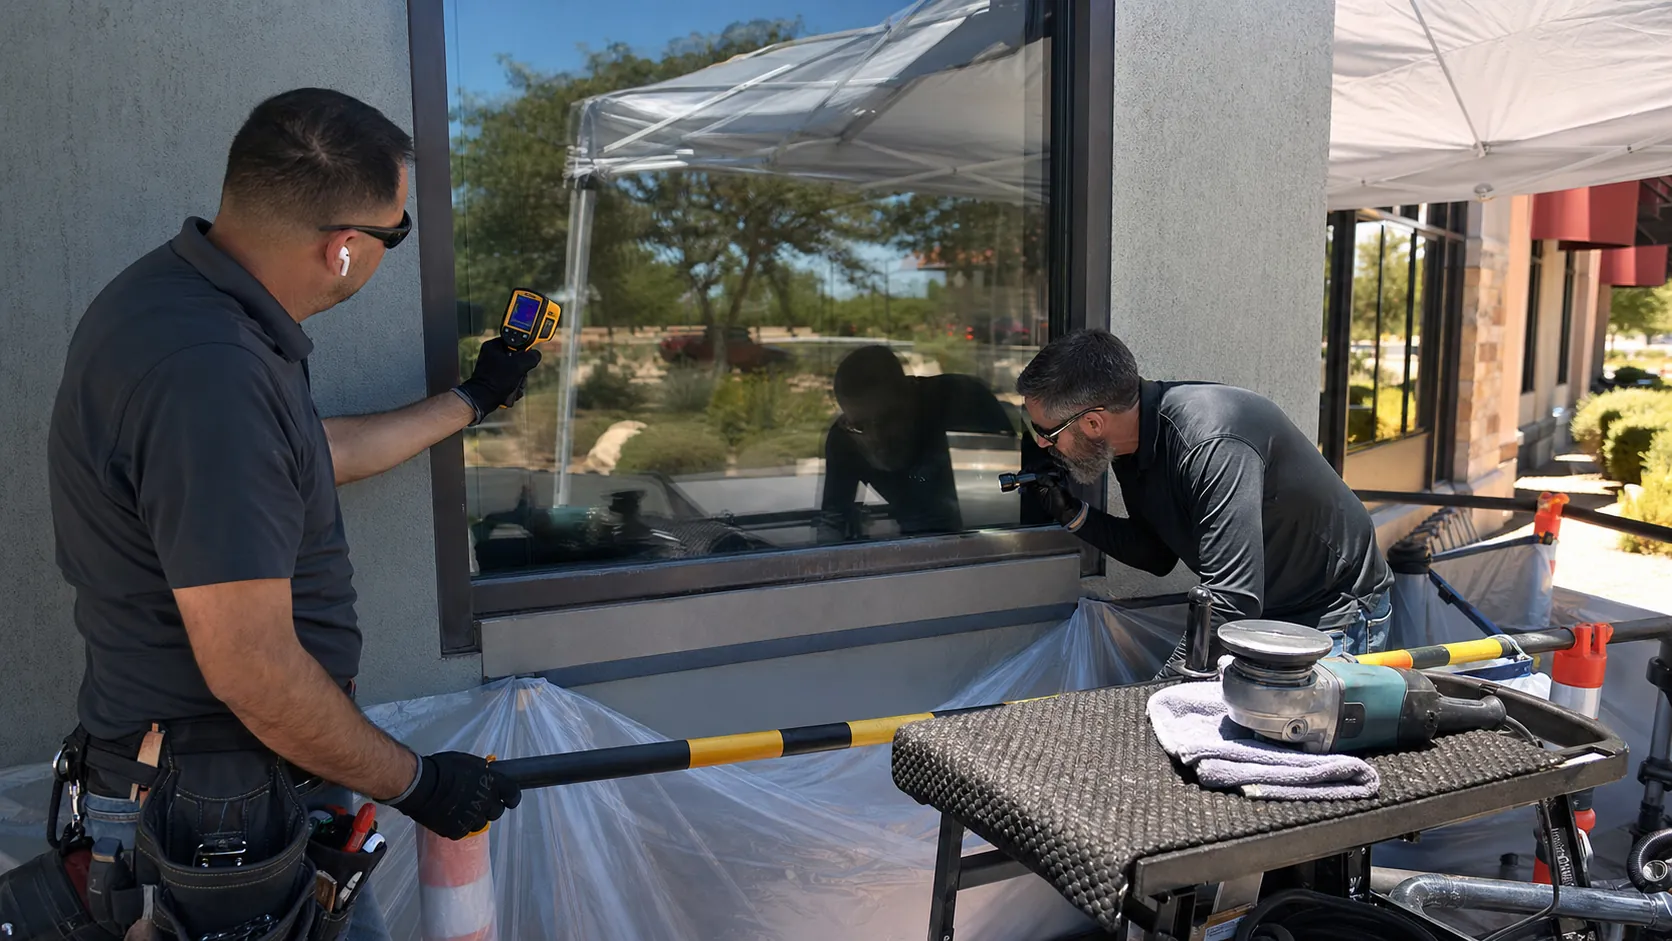
Vitro explains that a warmer glass center can expand while the cooler framed edge restrains it, producing tensile stress at the edge. If that stress exceeds the available edge strength, breakage occurs. Existing edge damage can greatly reduce that strength.
Identify the lite and its job
Record whether the glass is annealed, heat-strengthened, fully tempered, chemically strengthened, laminated, insulating, coated, fritted, patterned, bent, drilled, notched, wired, or part of a fire-rated or impact system. Locate doors, guards, overhead glazing, entrances, occupied areas, and fall hazards.
Find stamps, drawings, glass schedules, replacement records, coating surface, laminate edges, and insulating-unit spacers. A small lite in a fixed window has different consequences from a large tempered door, glass guard, or sloped panel. Safety glazing status and code role cannot be inferred from break pattern before a break occurs.
Inspect the entire edge system
- look for exposed chips, shells, vents, cracks, corner damage, drilled-hole damage, and contact with metal or masonry;
- check gaskets, stops, setting blocks, sealants, fasteners, frame distortion, missing clearance, and debris in the glazing pocket;
- inspect laminated and insulating-glass edges for moisture, delamination, sealant attack, spacer movement, or failed seals;
- record whether damage is on a free edge, supported edge, hole, notch, or surface near an edge;
- use a qualified glazing professional when removal of stops is needed to see a concealed edge.
Do not probe a hidden edge with a metal pick or force a camera into a tight pocket. Inspection should not become the initiating damage.
Map the thermal environment
Observe direct sun, moving shade, canopies, mullion shadows, interior blinds, dark films, spandrel areas, heaters, HVAC registers, ovens, lights, and stored objects near the glass. Record air and surface temperatures at the center, multiple edges, the planned work area, and a control pane.
A single infrared reading is not a full thermal analysis. Emissivity settings, reflections, spot size, angle, coating, and glass transparency affect instruments. Use a consistent validated method and treat the map as field information, not a strength certificate.
Weather can change while polishing. A cloud edge can expose a cold pane to direct sun; a canopy shadow can move across a warm center. Interior shades can trap heat. Choose a stable work window or provide a reviewed shading plan that does not itself create a sharp temperature boundary.
Make a go, modify, or stop decision
| Observation | Decision direction |
|---|---|
| Clean undamaged accessible edge, stable temperature, known glass, noncritical location | Proceed only to a controlled representative test with containment |
| Unknown construction, partly concealed edge, changing shade, coating uncertainty | Modify plan, obtain records, stabilize conditions, or involve fabricator and glazier |
| Chip, crack, edge contact, growing delamination, loose stop, failed support | Stop restoration and refer the glazing condition |
| Door, guard, overhead or fall-hazard glazing with unresolved damage | Barricade as needed and obtain responsible design or glazing review |
A waiver does not make a damaged pane safer. Risk allocation belongs in the contract, but field conditions still control whether the crew starts.
Control what restoration adds
Use the least removal supported by the defect assessment. Keep the abrasive sequence, pad condition, tool speed, force, pass pattern, overlap, water delivery, slurry removal, and dwell consistent with the validated system. Monitor surface temperature at the worked center and transition, not only at the beginning.
Maintain cooling and lubrication without directing water into insulating-glass seals, laminated edges, electrical systems, or occupied interiors. Do not cool a hot pane abruptly with cold water. Manage cables and suction equipment so they do not load the glass or frame.
Work outward through a deliberate blend rather than dwelling on the deepest point until it disappears. Excessive local removal can create lensing, while local heat and force add stress. A residual defect may be safer and optically better than chasing perfect disappearance.
Contain the consequence, not only the slurry
Establish an exclusion zone on both sides where fragments could fall or travel. Protect occupants, traffic, finishes, drains, and equipment. Plan for the break pattern and retention behavior of the actual construction, but do not assume tempered fragments are harmless or laminated glass will remain safely supported.
Access equipment must not bear against the lite. Review scaffold ties, lifts, rope systems, vacuum attachments, and worker position. Have an emergency path, first-aid response, building contact, glazier contact, and method to secure an opening.
Recognize stop signals immediately
- a tick, snap, crack sound, or visible line;
- unexpected edge movement, gasket shift, stop movement, or frame contact;
- a rapidly growing hot spot or temperature difference;
- laminated bubble, edge whitening, sealant softening, or coating change;
- tool chatter, suction loss, sudden vibration, or loss of cooling water;
- sun, shade, wind, interior heat, or access conditions leaving the approved range.
Stop the tool, keep people out, and avoid touching a suspected crack. Do not test stability by pushing the pane.
If the glass breaks, preserve evidence
Make the area safe first. When cause or responsibility matters, preserve pieces and their original orientation where safely possible. Photograph the opening, frame, setting, edge, work boundary, tool position, temperature log, weather, shade, and fracture pattern before cleanup removes evidence.
Vitro notes that qualified fracture analysis can often locate a break origin and distinguish thermal, bending, impact, edge, or surface-related modes. A familiar-looking pattern in a phone photo is not a complete forensic conclusion. Engage the responsible consultant or glass expert.
Restoration does not renew structural capacity
Polishing can modify shallow surface damage. It does not repair an edge chip, heal a crack, recertify safety glass, restore a coating, or prove the remaining strength of the pane. Heat-treated glass cannot be field-cut or drilled to remove a damaged edge.
The final record should state the defect treated, material removed, residual condition, temperature range, optics, and any referred glazing concerns. A clear surface is only one part of a sound glazing assembly.