Tempered-glass anisotropy: when dark bands are inside the stress pattern
Learn why heat-treated glass can show bands, spots, or iridescent fields in polarized light, how to separate that condition from dirt and distortion, and why polishing cannot remove it.
A clean pane can still show a dark map
A facade may look uniform on an overcast morning and develop dark circles, leopard spots, or broad bands when the sky turns blue. The marks can become stronger through polarized sunglasses and disappear when the viewer rotates them. Washing has no effect. This behavior often points to anisotropy, also called a strain pattern, quench pattern, quench marks, or iridescence in heat-treated glass.
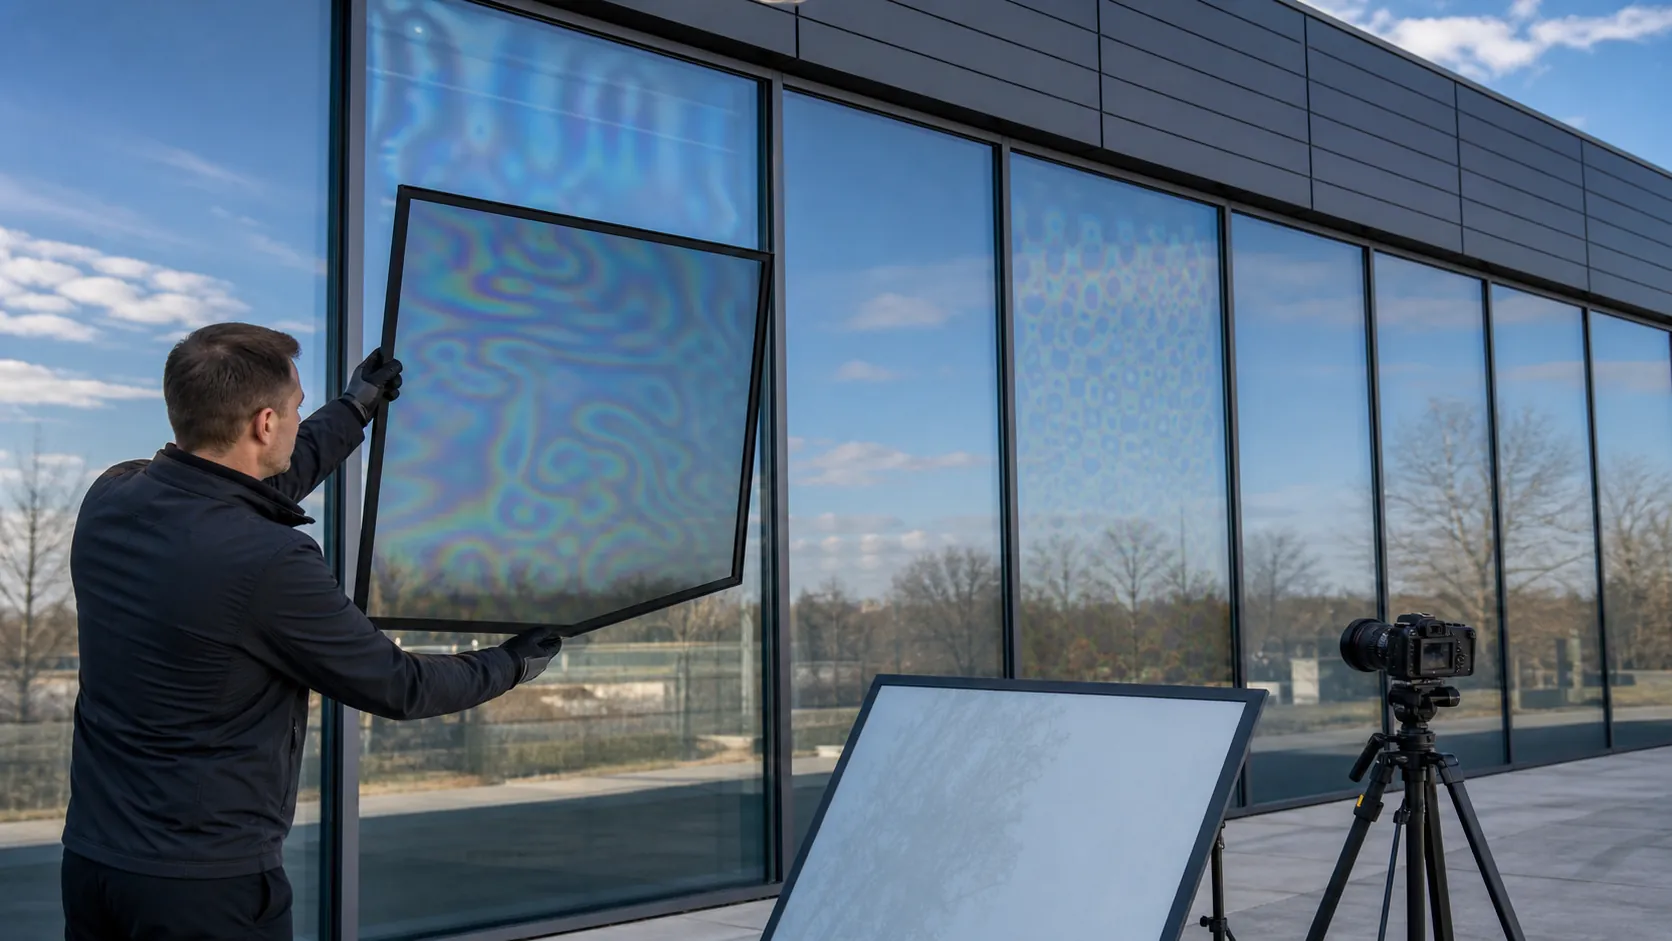
Anisotropy is not a deposit sitting on the exposed face. It is an optical effect associated with differences in residual stress through heat-treated glass. That distinction matters before anyone orders acid cleaning, scraping, or polishing for a condition those processes cannot reach.
How heat treatment creates the pattern
Tempered and heat-strengthened glass is heated and then cooled rapidly with arrays of air jets. The surfaces cool and stiffen before the center. This produces the residual stress profile that gives the finished lite its mechanical and breakage characteristics.
Cooling is not perfectly uniform across the sheet. Air-nozzle geometry, convection, glass thickness, coatings, furnace loading, support rollers, and process settings can leave local differences in stress. When polarized light passes through those regions, the two optical components travel at slightly different speeds. Their relative delay, called optical retardation, can appear as light and dark fields or color.
The pattern may resemble rows of dots, elongated shadows, rings, stripes, crosses, or irregular patches. It can differ from lite to lite even when the glass came from the same elevation. Pattern visibility alone does not tell the observer whether the pane is tempered or heat-strengthened, nor does it measure its strength.
Why the marks come and go
Partially polarized daylight makes the effect visible. Blue sky, low sun angles, reflected water, wet pavement, snow, and some building reflections can strengthen the polarization. Polarized sunglasses add another filter. Rotate the glasses about ninety degrees and a stress pattern may weaken, invert, or change color.
Viewing angle matters too. A person close to one pane may see little, while someone across the street sees a broad dark field. Coatings, laminated interlayers, insulating-glass construction, interior shades, and the reflected scene can add or subtract contrast. A photograph therefore records one combination of weather, angle, lens, exposure, and facade state, not a permanent appearance under every condition.
Run a controlled observation before diagnosing
- Record the exact elevation, lite, surface, time, weather, sun position, viewing distance, and angle.
- Look with the unaided eye, then through known polarized eyewear or a rotatable polarizing filter.
- Rotate the filter while holding the position. Note whether the mark changes with filter orientation.
- Move sideways and farther away. Compare neighboring lites under the same reflected scene.
- Inspect the exposed surface with broad light and raking light for residue, scratches, coating damage, or polish marks.
- Review glass markings, schedules, fabrication records, heat-treatment certification, coatings, laminates, and insulating-unit construction.
- Repeat under a different sky condition if the appearance drives an acceptance decision.
A changing pattern under a rotating polarizer supports an anisotropy hypothesis. It does not excuse unrelated contamination or prove that every band is a quench mark. Multiple optical and surface conditions can overlap.
Separate anisotropy from conditions that need different remedies
| Condition | Useful observation | What treatment can change |
|---|---|---|
| Anisotropy or strain pattern | Changes with polarized light, viewing angle, sky, or filter rotation | Cleaning and polishing do not remove the through-thickness stress pattern |
| Roller wave or edge kink | Reflected straight lines bend in a repeating geometric form | Surface cleaning does not change glass shape |
| Coating variation or damage | Color or reflectance follows a coated surface and may remain in broad light | Cleaning may remove residue but cannot restore removed or altered coating |
| Interference color | Closely spaced glass surfaces or films create colored fringes that shift with angle | Depends on the assembly, spacing, film, or surface involved |
| Mineral, silicone, or construction residue | Deposit has edges, texture, transfer, wetting change, or surface response in a test | A compatible cleaning test may remove actual material on the surface |
| Scratch or restoration artifact | Follows tool motion and becomes clear in raking light on a specific face | Only a qualified test can establish whether controlled restoration is suitable |
Do not diagnose by shape alone. Quench patterns can look circular, but so can suction-cup residue. Linear anisotropy can resemble roller or polishing marks. A polarizer, surface examination, records, and repeatable viewing positions provide stronger evidence than a single phone photograph.
What ASTM C1901 can and cannot tell you
ASTM C1901 is a test method for measuring optical retardation in flat, monolithic, heat-treated architectural glass. A suitable instrument maps retardation related to stress differences and produces measurements that can be compared under a defined procedure.
The method is not, by itself, an architectural appearance specification. It does not establish a universal pass or fail limit for a facade, measure surface compression, or determine whether a lite reaches a required temper level. Project documents must separately state any applicable optical-quality criteria, sampling plan, viewing conditions, and acceptance process.
If a dispute affects many lites, involve the glass fabricator, glazing contractor, consultant, and owner before testing. Agree on which standard edition applies, instrument calibration, measurement grid, environmental conditions, reporting format, and how results relate to the contract. Measurements without an agreed decision rule can describe the glass accurately and still fail to settle the dispute.
Why restoration is not the fix
Glass restoration removes or modifies a shallow portion of an exposed surface. Anisotropy results from the internal residual-stress distribution created during heat treatment. Polishing cannot make that stress map uniform. Aggressive work can instead add optical distortion, haze, localized lensing, scratches, coating loss, or a new polish pattern over the original effect.
A separate surface defect may still be restorable. For example, a lite can have both anisotropy and removable mineral deposit. Test the deposit on a defined area, inspect it dry under normal and raking light, and document that the underlying polarized-light pattern remains. The scope should promise removal of the verified surface condition, not disappearance of every optical feature.
Build a useful field record
Use elevation drawings and lite numbers. Capture an unfiltered photograph, a filtered photograph, filter orientation, sky view, reflected scene, distance, angle, and time. Add close views of the surface and any glass stamp. Avoid automatic image enhancement that makes one field darker than it appeared in person.
Report observations in neutral terms such as visible dark bands under polarized eyewear from the southwest position. Reserve cause and compliance conclusions for evidence supported by records and the agreed standard. This keeps a cleaning complaint from becoming an unnecessary restoration project and gives the glazing team information it can actually use.