Sprinkler stains on glass: fix the water source first
Map the spray pattern, correct irrigation overspray and misting, identify glass and water chemistry, distinguish removable deposit from surface change, and test restoration safely.
The stain often draws a map of the sprinkler
A fan of spots rising from one corner, a sharp arc across lower glass, or a dense band near landscaping can reveal repeated irrigation overspray. Each cycle wets the pane. As droplets evaporate, dissolved and suspended material stays behind. Repetition can build a rough deposit and may eventually contribute to a changed glass surface.
Restoring the pane while the head still sprays it is temporary work. Observe the irrigation system through a full cycle before choosing glass chemistry.
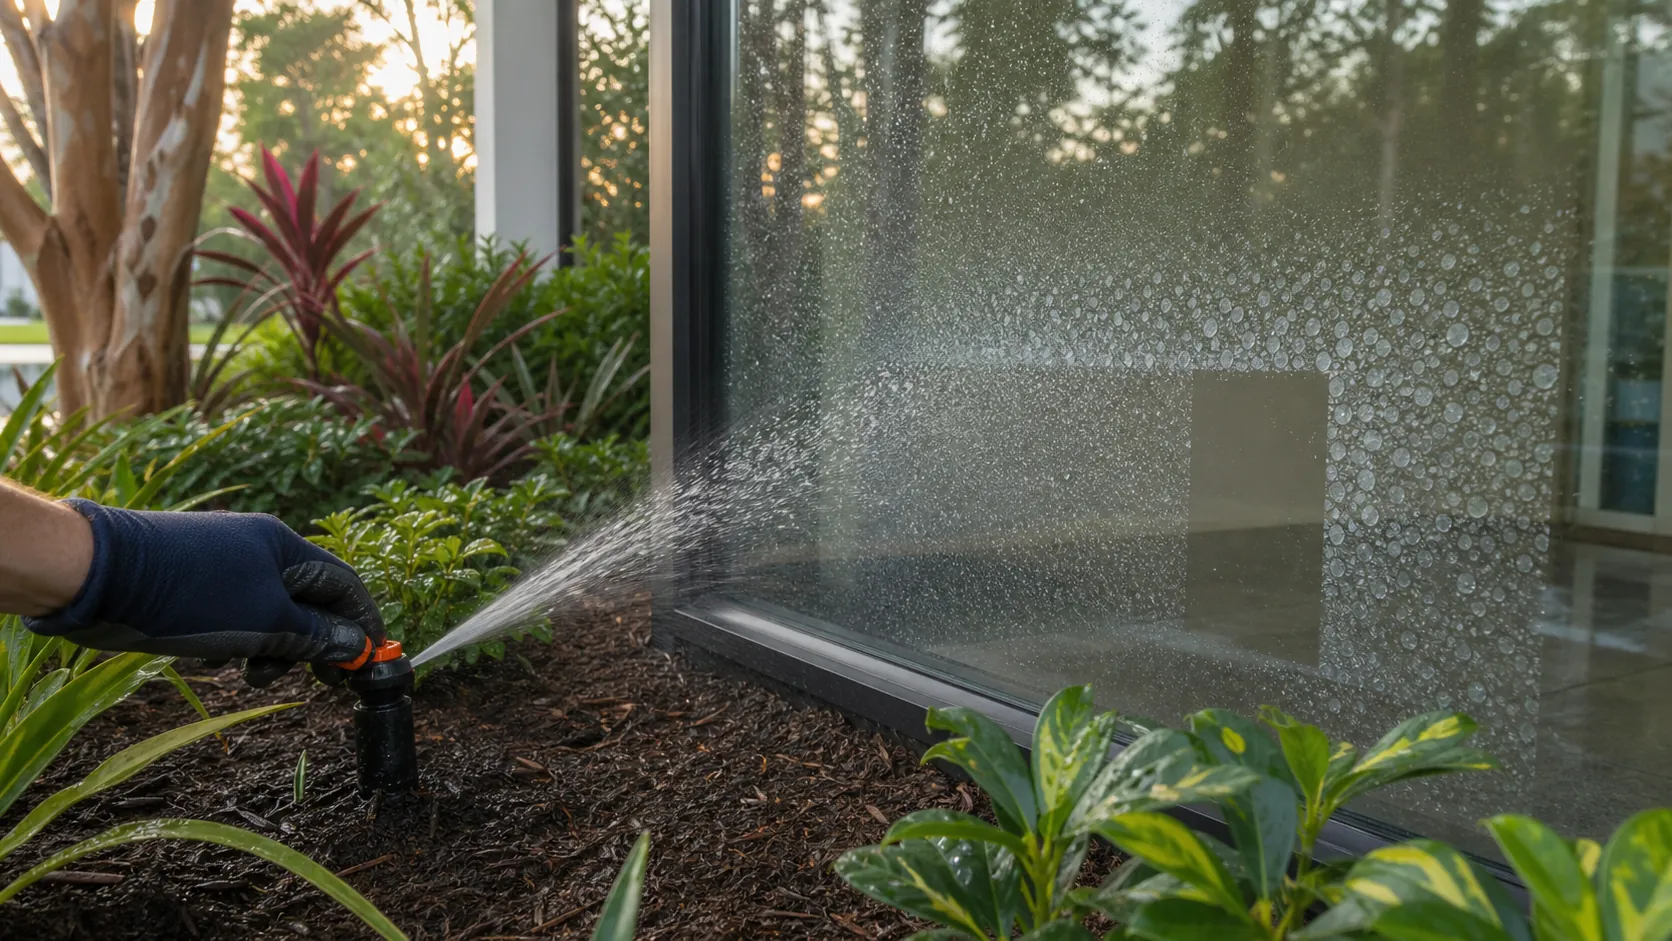
Correct the irrigation branch
Run each nearby zone and record head location, nozzle pattern, pressure behavior, wind, broken parts, leaks, misting, runoff, schedule, and which glass areas become wet. EPA WaterSense guidance recommends inspecting, connecting, directing, and selecting irrigation components so water reaches the landscape rather than walls and hardscape.
- Redirect the arc away from the building while maintaining intended landscape coverage.
- Replace broken or mismatched components using the irrigation design requirements.
- Correct excessive misting or pressure through the proper regulated equipment.
- Adjust schedule for season, plant need, soil intake, and local restrictions.
- Use cycle-and-soak where runoff indicates the soil needs shorter intervals.
- Verify the correction during actual operating conditions, including wind.
Do not solve overspray by leaving plants without required water or by blocking a head with an improvised object. An irrigation professional may need to redesign spacing, nozzle, pressure regulation, or plant-zone layout.
Identify what the water can leave
USGS defines water hardness largely by dissolved calcium and magnesium. Water can also carry silica, iron, salts, treatment chemicals, soil, fertilizer, and organic material. Evaporation concentrates what does not leave with the water. The visible spot is therefore not a pure certificate of calcium carbonate.
Obtain a current water analysis when repeated staining justifies it. Source water can differ between municipal supply, well, reclaimed irrigation, softened water, and blended systems. A handheld TDS meter measures conductivity-related dissolved content; it does not identify which compounds are present.
Identify the glass before the remover
Record pane make-up, heat treatment, lamination, tint, film, frit, and coatings. Determine which face is exposed. Reflective or Low-E coatings can occupy an accessible surface, and an acid or abrasive that changes ordinary bare glass may remove or discolor a coating instead.
Inspect frame, metal, sealant, stone, stucco, plants, and painted finishes around the test. A product compatible with a glass deposit can still damage the window system or its surroundings. Keep cleaning fluids away from vulnerable laminated edges.
Classify the dry appearance
| Dry observation | What it may indicate | Useful next evidence |
|---|---|---|
| Raised rough white dots | Accumulated surface deposit | Magnification, water analysis, controlled routine-cleaning test |
| Clear centers with mineral rings | Repeated droplet evaporation | Compare pattern with a live irrigation cycle |
| Flat cloudy patch after deposit removal | Residual mineral, chemical change, microroughness, or coating damage | Dry raking light and a graduated test panel |
| Orange, brown, or black staining | Iron, metal runoff, organic material, or mixed contamination | Trace the source and identify composition |
| Clouding between panes | Insulating-unit or internal-surface condition | Glazing-system diagnosis, not exterior polishing |
Do not call every persistent mark etched. Likewise, do not promise that every raised deposit can be removed without an optical remainder. The test sequence establishes how much is removable soil and how much is altered surface.
Begin with routine cleaning
Flood loose soil with clean water and wash the identified compatible glass using a mild approved detergent and non-abrasive tool. Rinse and dry. This removes dirt that would interfere with the next test and prevents loose grit from entering an abrasive process.
Mark a representative area that includes both heavy and light spots. Photograph it dry under consistent light. Protect adjacent materials and prepare collection for runoff. The control area should remain untouched for comparison.
Escalate chemistry by product instruction
Select a product intended for the identified deposit and compatible with the exact glass and surrounding materials. Follow its label for dilution, dwell, temperature, personal protection, ventilation, application, rinse, and disposal. Keep the test wet if the instructions require it, and never mix products.
Do not publish or improvise a universal acid percentage. Mineral composition, glass, coatings, temperature, and exposure history change the safe range. Hydrofluoric-acid-containing products require especially strict professional controls and can alter glass; they are not routine homeowner cleaners.
Rinse completely, let the panel dry, and inspect it before repeating. Multiple unrecorded applications make it impossible to know which exposure produced a color or gloss change.
When mechanical restoration becomes the test
If approved cleaning removes the raised deposit but a compatible bare-glass face remains cloudy or rough, a controlled restoration test may be considered. Establish that the defect is on the accessible substrate, not a coating, film, laminate, or sealed-cavity face.
Use the restoration system's abrasive sequence, lubrication, temperature control, edge protection, and slurry containment. Each finer stage should remove the prior pattern. Blend a wide enough area to avoid a localized lens, then polish and inspect fully dry from normal viewing positions.
Agree on acceptance before scaling up. A test may reveal that partial visual improvement is practical while total removal would introduce objectionable distortion. Replacement can be the better branch for incompatible coatings, severe optical change, cracks, edge damage, or failed insulating units.
Verify that recurrence has been interrupted
- Run the corrected irrigation under the conditions that previously reached the window.
- Confirm no head, leak, runoff, or wind-carried mist wets the restored pane.
- Photograph the dry result and corrected spray boundary.
- Set a maintenance inspection for the irrigation and glass.
- Record water source changes, because chemistry can change with supply or treatment.
A documented glass-restoration project joins landscape correction and surface work. The clean pane is only one half of the repair.