Rust, metal runoff, and oxidation stains on glass
Trace colored streaks to their source, distinguish iron oxide from other metal deposits and glass damage, test compatible removal, and repair the runoff path before restoration.
Follow the streak upward before choosing a remover
Orange, brown, gray, white, green, or blue-green marks on glass are often grouped under the word rust. The color is a clue, not a diagnosis. Iron oxide from carbon steel, runoff from weathering steel, aluminum corrosion products, copper salts, metal-bearing sealant bleed, and transferred metal can require different responses. Some marks are deposits; others accompany a permanently altered glass surface.
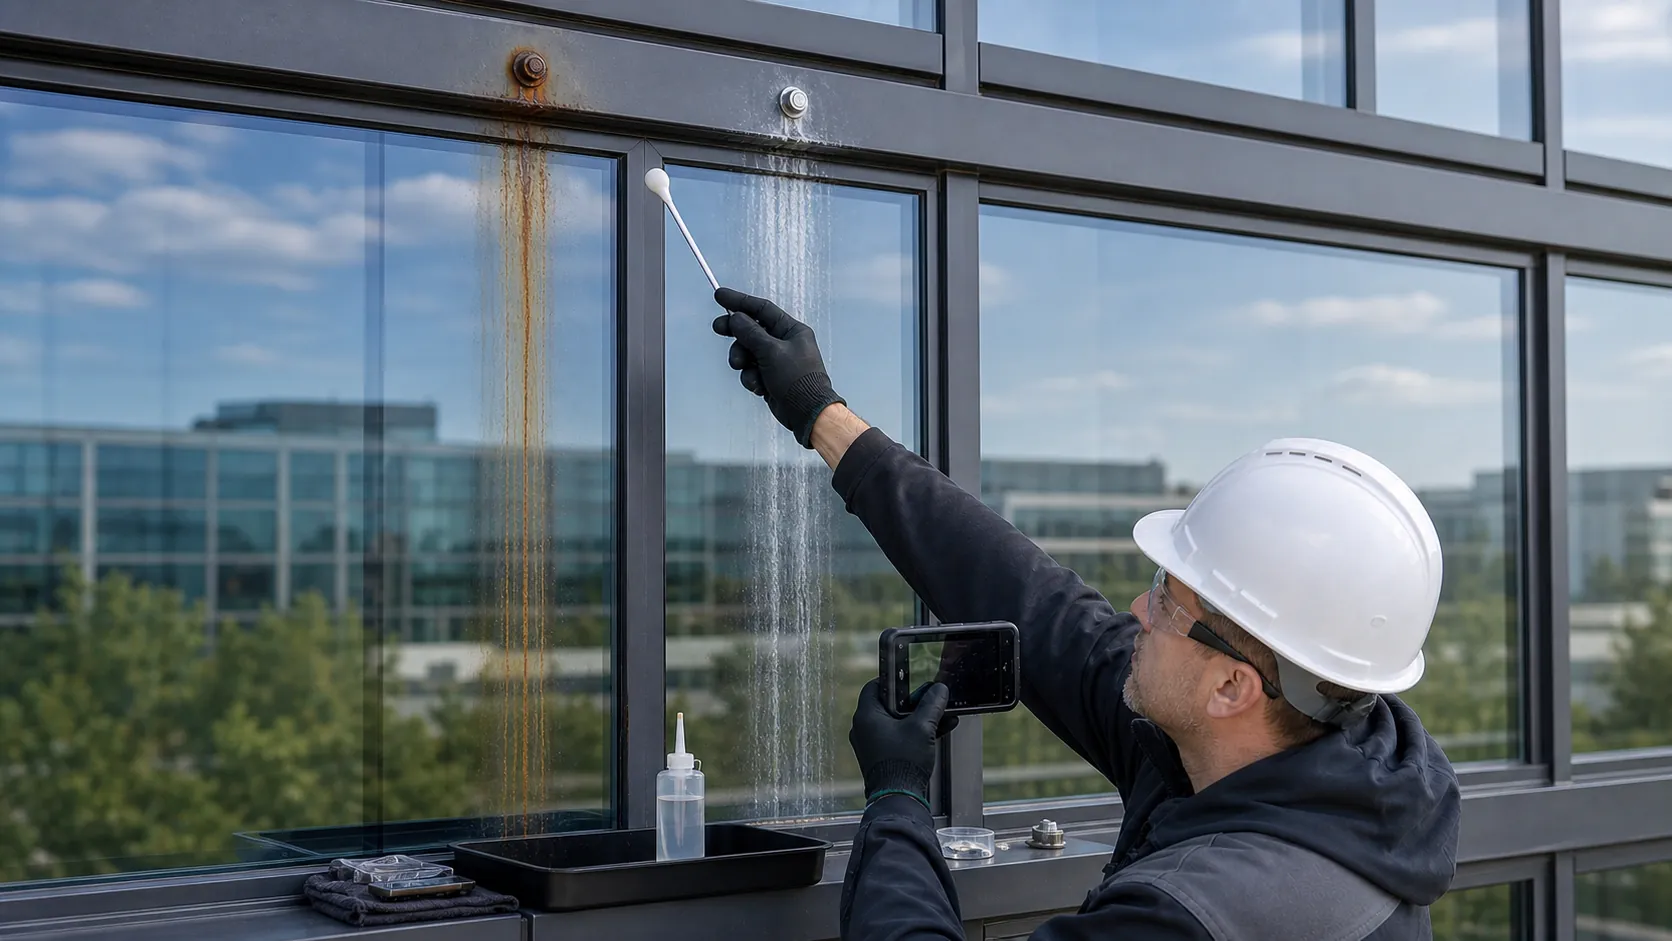
A bottle labeled rust remover does not solve that uncertainty. Acidic and chelating products may react with glass coatings, film, frames, gaskets, sealants, stone, paint, and the metal that produced the stain. Identify the assembly and the source before putting chemistry on a facade.
Map the runoff path while conditions are dry
Start at the lowest visible deposit and trace it upward. Look at fasteners, steel angles, railings, roof equipment, facade anchors, flashing, panel joints, stone ledges, window heads, sealant joints, planters, irrigation, and maintenance platforms. Check where rain or wash water collects before it crosses the glass.
Record whether the pattern begins at one point, follows every mullion, appears only below a metal panel, or returns after each storm. Compare sheltered and exposed lites. Note building age and recent grinding, welding, facade washing, roof work, or metal replacement. A fresh construction transfer differs from years of recurring runoff.
Collecting a sample may help a qualified laboratory or consultant, but do not scrape an unknown coating or corrosion product bare-handed. Preserve chain of custody when a construction claim or warranty is involved.
Separate common metal-related conditions
| Condition | Useful clues | Important distinction |
|---|---|---|
| Iron oxide runoff | Orange to brown path below ferrous fastener, rail, flashing, or steel work | Deposit may recur until corrosion and drainage are corrected |
| Weathering-steel runoff | Broad rusty discharge below intentionally patinating steel, often strongest during early weathering | The steel is designed to oxidize, so detailing and maintenance must manage released oxides |
| Aluminum oxidation or finish runoff | White, gray, or chalky material near aluminum frames or panels | May be corrosion product, deteriorated finish, sealant residue, or cleaner reaction |
| Copper-bearing runoff | Green or blue-green deposit below copper, bronze, or drainage path | Can stain glass and porous materials; source metal may be functioning as designed |
| Metallic rub | Gray line or smear where a tool or metal object contacted glass | Transferred metal can resemble a scratch but is not the same as a runoff field |
| Hot-particle or grinding damage | Raised specks, pits, craters, or spark-direction pattern | Fused debris and glass loss require a different risk assessment |
| Glass alteration below a former deposit | Cloudy, rough, or dull area remains after identified residue is removed | Ordinary cleaning has ended; restoration or replacement must be evaluated |
More than one condition may exist. Iron-bearing grit can lodge in sealant residue, and runoff can pass over mineral deposits already on the pane. A small test should be judged layer by layer.
Confirm the glass surface and adjacent materials
Obtain the glazing make-up, heat treatment, coating surfaces, applied film, sealants, gaskets, frame finish, and nearby masonry or metal information. A method acceptable on uncoated exterior glass can permanently mark an exposed low-emissivity coating, reflective surface, film, anodized aluminum, limestone, or painted panel.
Inspect the mark dry under broad and raking light. Check both accessible sides. Determine whether it transfers to a clean dry cloth, has relief, feels rough only where a compatible non-scratching method permits contact, or changes appearance when wet. Do not use a razor, acid drop, or metal point as a universal test.
Run a controlled removal test
Begin with the glass and window manufacturer's approved routine-cleaning procedure. Protect adjacent surfaces and collect runoff. If ordinary soil leaves but the metal-related deposit remains, identify a product or professional process compatible with every exposed material. Read its label and safety data sheet, and test a small inconspicuous representative area.
The test needs a defined concentration, application tool, contact time, agitation, rinse, neutralization only if the product specifically requires it, and drying method. Inspect the area fully dry. Record deposit reduction, glass clarity, coating or gloss change, frame response, sealant response, and any remaining roughness or haze.
Do not let a rust remover dwell longer merely because the first pass was incomplete. Do not mix acids, bleach, ammonia, or other cleaners. Stronger chemistry can turn a removable deposit into damage across several facade materials.
When cleaning becomes restoration
If identified residue is gone but dullness, pits, or rough optical haze remain, the glass itself may have changed. A representative glass-restoration test can determine whether controlled mechanical refinement improves the surface without unacceptable heat or distortion.
Restoration removes glass stock; it does not dissolve the metal and refill a pit. Large uneven fields, exposed coatings, deep corrosion paths, edge damage, heat-treated glass with sensitive optics, and safety-critical glazing need careful review. Replacement may be the more predictable outcome when the affected face cannot be restored or the source has damaged the assembly.
Repair the source before accepting the pane
Cleaning is temporary if water continues across corroding metal. Correct the failed fastener, coating, joint, flashing, drip edge, drainage path, incompatible material, or work practice through the responsible trade and design team. Weathering steel may need detailing that directs expected oxide-laden water away from glazing and porous finishes rather than an attempt to stop all patination.
After correction, monitor the first rain or controlled water test under the applicable facade procedure. Do not create a new leak by spraying water into joints. Keep an elevation map, source photograph, product records, cleaning test, dry result, source repair, and follow-up date. Recurrence then becomes evidence, not a surprise.