Pressure-washer surface cleaners: setup without stripes
A field guide to deck size, two-nozzle sizing, spray-bar balance, startup checks, overlap, pace, stripe diagnosis, swivel care, and safe shutdown.
A round deck does not make the setup automatic
A pressure-washer surface cleaner can wash flat concrete more evenly than a hand-held wand, but only when the machine, accessory, spray bar, and nozzles belong to the same hydraulic setup. The deck hides the rotating jets. It does not correct a mismatched flow rate, an oversized orifice, a worn nozzle, or a rushed walking pace.
Begin with the identification plates and manuals for both the pressure washer and the cleaner. Confirm maximum pressure, required flow, allowed water temperature, connection type, and the accessory's intended surface. The lower rating controls. Never assume that two cleaners with the same deck diameter have the same limits.
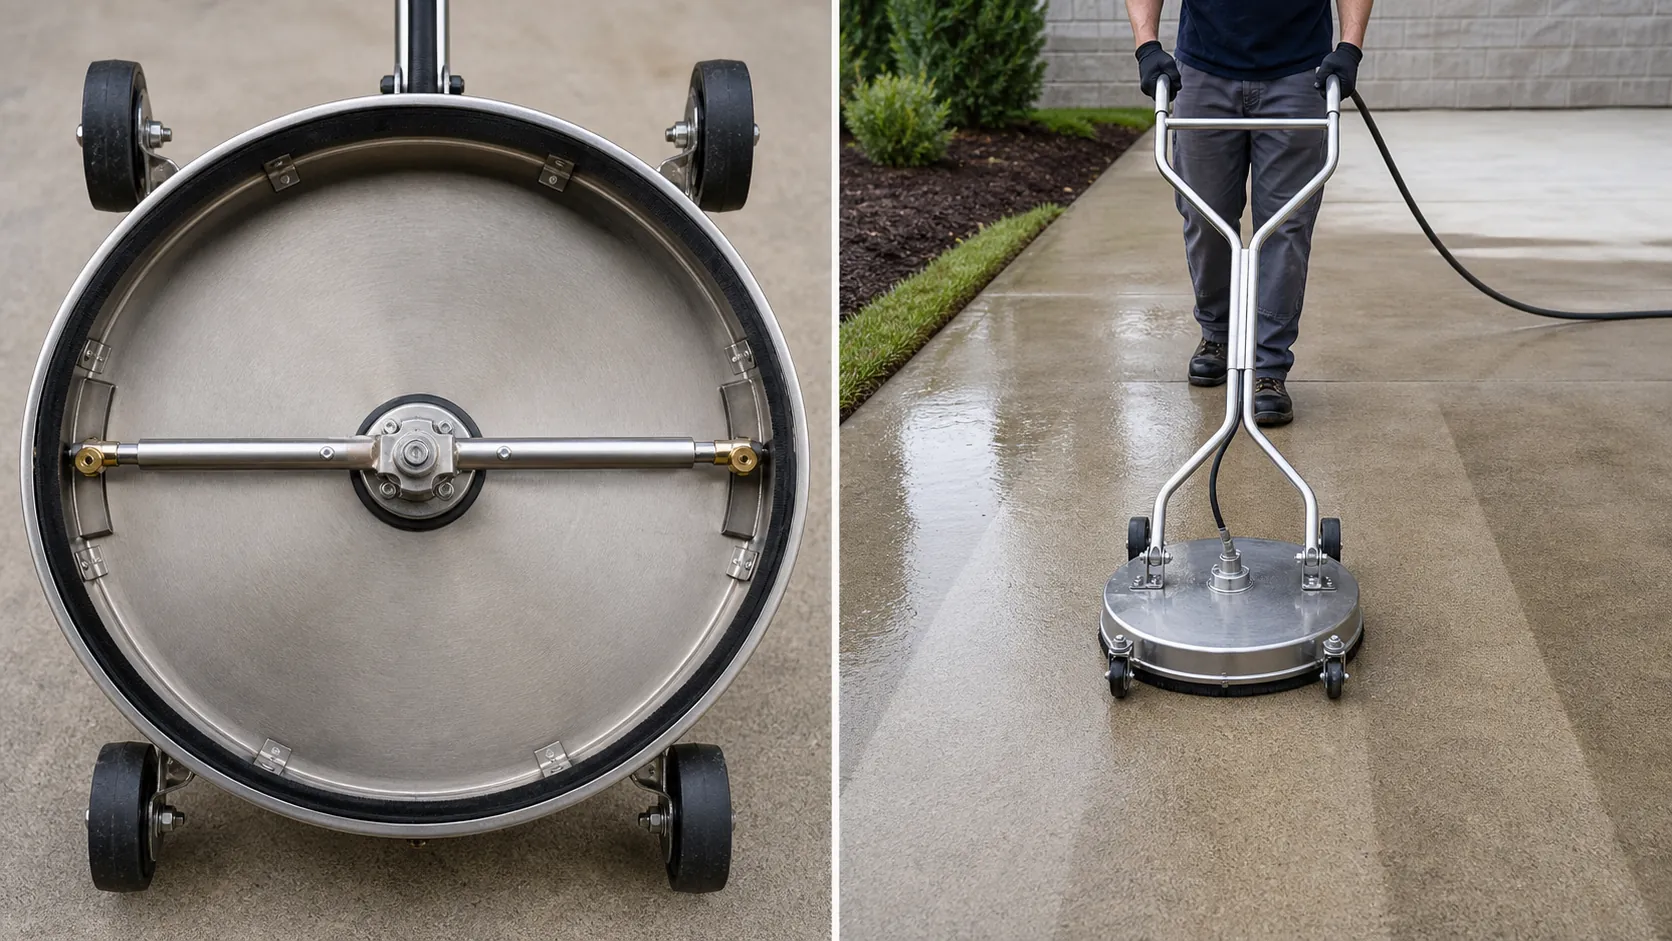
Match flow before thinking about deck width
A larger deck covers more area per pass, yet its spray tips still need enough flow and pressure to clean across that width. A cleaner that is too large for the pump may feel slow, leave faint rings, or tempt the operator to crawl. A smaller deck can be productive when it is properly fed and moved at a consistent pace.
Use the manufacturer data for the exact accessory. Some product lines publish minimum and maximum gallons per minute, pressure, temperature, deck diameter, and installed nozzle size. Treat these as model-specific values, not a universal inches-per-GPM formula. Hose length, elevation, unloader behavior, restrictions, and wear can change the pressure that reaches the tool.
Size the pair of nozzles as one system
Most common surface cleaners use two tips on one rotating bar. The pump flow is shared by those two outlets. Select the pair with the pressure-washer manufacturer's nozzle chart or an equivalent calculation that uses actual flow and intended operating pressure. Do not choose each tip as though it receives the full machine flow.
- Determine the machine's usable flow and planned operating pressure.
- Confirm that the cleaner and swivel can accept both values.
- Divide total flow across the two matching outlets.
- Use the maker's chart to select the proper orifice for each outlet.
- Install identical tips unless the accessory manufacturer explicitly specifies another arrangement.
An orifice that is too small can drive pressure toward the system limit and overload components. One that is too large reduces working pressure. A mixed pair makes the bar hydraulically uneven. Worn tips gradually pass more water, so a setup that was correct when new can lose cleaning force later.
Inspect the bar before pressurizing it
Disconnect power and release trapped pressure before touching the underside. Check that the bar turns freely, both tips are present, retaining parts are secure, and the nozzles are not damaged or blocked. On designs with fan tips, align each nozzle groove with the spray bar as the manufacturer directs. Misalignment can change the rotation and cleaning pattern.
Look for a bent bar, impact marks, loose hardware, hose abrasion, deck damage, and leakage around the swivel. Remove debris with the cleaning method specified for the nozzle. Never enlarge an orifice with a drill bit or improvised wire.
Start with water flow and a controlled test
- Clear people, pets, loose objects, and trip hazards from the work area.
- Inspect the slab for open joints, unstable patches, coatings, sealers, and adjacent materials that need protection.
- Connect the water supply and purge air according to the pressure-washer instructions.
- Place the cleaner flat on the test area before applying operating pressure.
- Confirm that both nozzles flow and the bar rotates smoothly.
- Test in a discreet section, then let it dry enough to judge color and pattern.
Wear the protective equipment required by the machine and chemical labels. Never inspect underneath while the system is running. High-pressure injection injuries can look small at first and still require urgent medical care.
Use pace and overlap to control the finish
Walk in straight, deliberate passes. Keep the deck flat and overlap neighboring paths enough to prevent a missed seam. The useful overlap is the amount that produces an even dry result on that surface. Excessive overlap wastes time and can repeatedly expose the same edge band.
Do not park a rotating cleaner over one spot, especially on softer concrete, wood, coated work, or unknown substrates. If traffic lanes or organic staining need more dwell, use the appropriate pretreatment and controlled rework instead of holding the jets stationary.
| Dry pattern | Likely checks | Next move |
|---|---|---|
| Parallel light or dark bands | Pace, overlap, tip wear, blocked tip, nozzle alignment | Stop, inspect, correct, and repeat a small test |
| Circular arcs | Moving too fast, inadequate flow, uneven bar rotation | Verify supply and tool operation, then slow the test pass |
| One side cleans harder | Mismatched tips, partial blockage, bent bar | Depressurize and compare both outlets |
| Random pale patches | Uneven pretreatment, surface repairs, sealer, variable porosity | Identify the substrate difference before adding pressure |
| New cuts or exposed aggregate | Surface incompatibility, excessive pressure, stationary operation | Stop work and reassess the method |
Stop immediately when the machine tells you to
Unusual vibration is not a condition to work through. It can indicate a damaged, loose, obstructed, or unbalanced bar. Stop if the deck strikes an obstacle, the swivel leaks, the rotation becomes erratic, a hose is damaged, or the sound changes sharply. Shut down, isolate the energy source, trigger the gun to relieve pressure, and inspect only after the assembly is safe to handle.
Keep the deck away from walls, posts, vehicle tires, exposed wiring, glass edges, and people. The shield controls splash; it does not make the rotating jets safe around feet or hands.
Rinse, inspect, and maintain the correct model
After cleaning, rinse displaced soil and chemistry toward an approved collection or drainage route. Avoid sending wash water into storm drains unless local rules and the material being collected allow it. A final low-pressure rinse also reveals residue hidden by foam or slurry.
Flush the accessory as directed, examine the tips for wear, and check the bar and swivel before storage. Some swivel designs have a grease point and a specified lubricant interval; others are sealed. Follow the manual for the exact model rather than adding grease by habit. Protect the unit from freezing, because retained water can damage passages and seals.
A professional power-washing assessment should connect surface condition, chemistry, water control, and machine setup. A surface cleaner is one controlled application tool within that plan.