
Oxidized vinyl siding and tiger striping: diagnose before washing
Use dry wipe and protected-area comparisons to separate transferable chalk, biological soil, runoff stripes, heat damage, and permanent color change, then follow the siding manufacturer without driving water behind the cladding.
Tiger striping describes a pattern, not a cause
Vertical dark or light bands on vinyl siding are often called tiger stripes. The pattern may follow runoff below gutters, window corners, laps, fasteners, or roof edges. It can contain atmospheric soil, biological growth, surfactant residue, roofing runoff, metal contamination, or uneven oxidation. Pressure alone cannot diagnose which one.
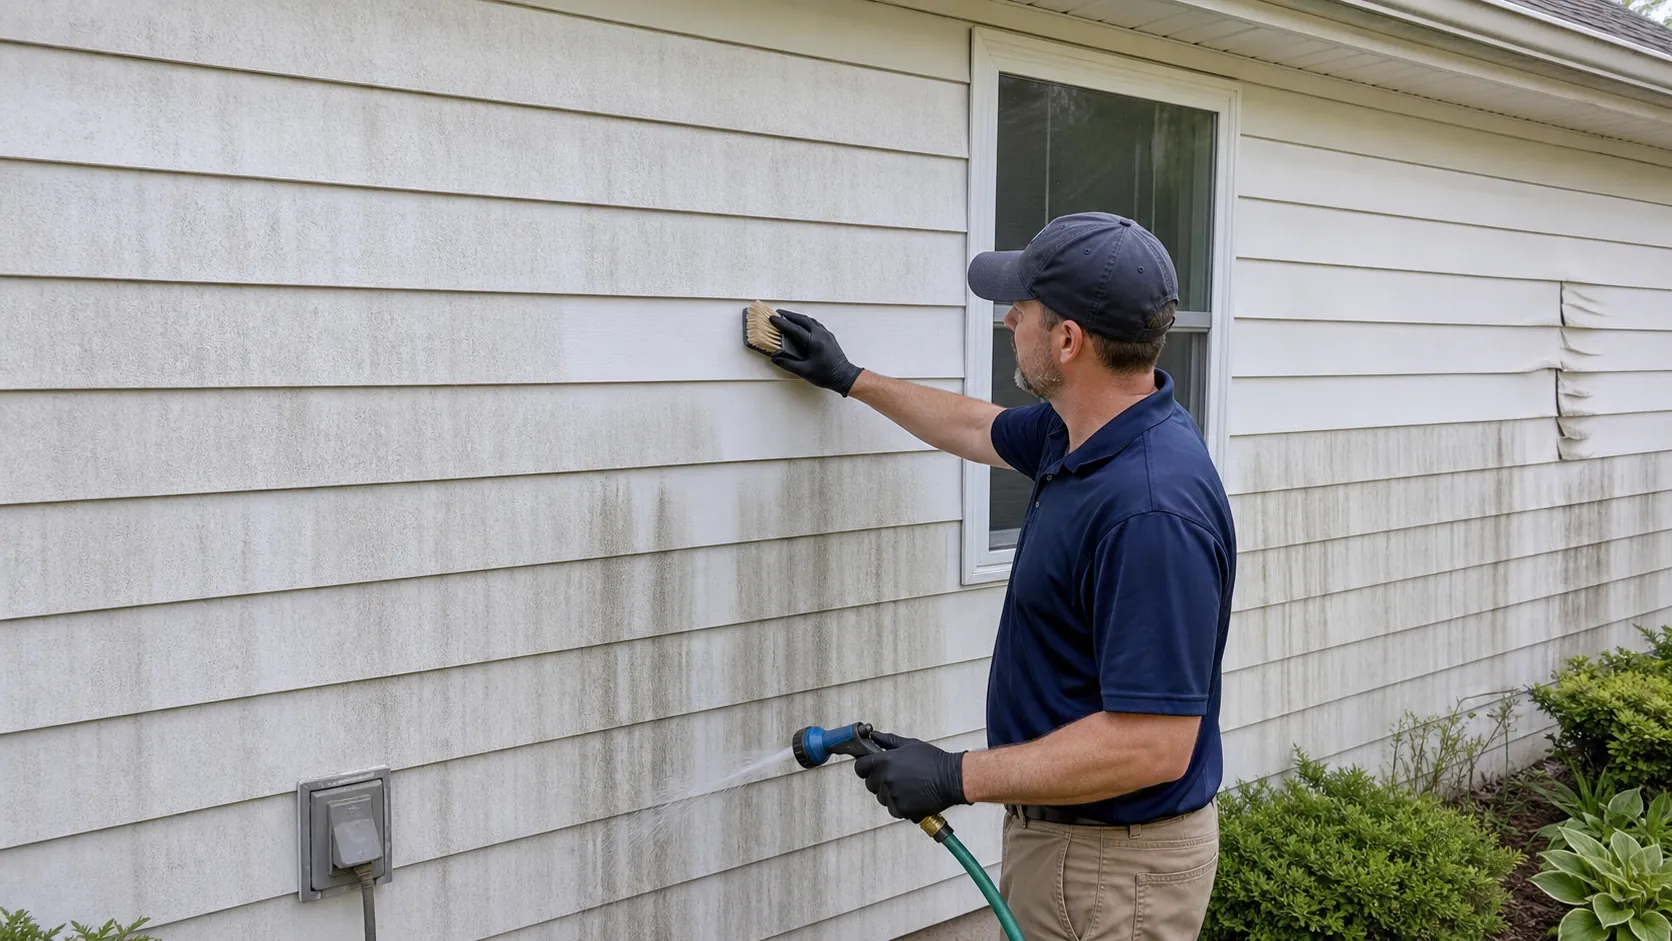
Confirm that the cladding is vinyl
Vinyl, insulated vinyl, polypropylene shapes, painted aluminum, steel, fiber cement, engineered wood, and composite cladding can look similar from grade. Find manufacturer, profile, color, age, warranty, installation records, prior paint or coating, and cleaning instructions.
Inspect panels for looseness, cracks, open accessories, missing locks, buckling, melt or heat distortion, impact, holes, failed caulk, open penetrations, and signs of water entry. Vinyl siding is a drained cladding, not a sealed wall. Its laps and accessories must not be treated like waterproof joints.
Use three simple dry comparisons
- Wipe an exposed dull area with a clean dark microfiber. Transfer of light powder supports a chalk or oxidation condition.
- Compare siding behind a downspout, shutter, meter, or overhang with adjacent exposed material. A protected color and gloss difference shows weathering history.
- Wipe a stripe and the field beside it with separate cloths. Note soil transfer, color transfer, tack, and whether the underlying sheen differs.
Do not rub hard enough to polish one spot. Manufacturers such as Alside warn that vigorous rubbing can create glossy areas. Photograph the dry cloths and panel before wet cleaning changes the evidence.
Separate the conditions
| Observation | Likely category | Cleaning expectation |
|---|---|---|
| Loose gray or brown soil with stable panel color | Atmospheric dirt | Compatible detergent and soft agitation may remove it |
| Green or dark growth concentrated in shade and moisture | Biological film | Use a label-approved treatment and correct moisture where practical |
| White or colored powder transfers from broad exposed areas | Chalk or oxidation | Cleaning may remove loose oxidation but can reveal permanent uneven color and gloss |
| Stripes track from a gutter, metal, shingle, or sealant | Runoff contamination | Correct the source and test stain-specific compatibility |
| Panel is wavy, melted, brittle, or pulled around fasteners | Heat or installation damage | Cleaning cannot restore geometry; refer repair or replacement |
| Color differs without transferable residue | Fading, staining, coating change, or prior repair | Washing may not make the field uniform |
Oxidation is material from the weathered surface. Removing it is not the same as returning the original factory finish. An aggressive wash can create a cleaner but patchier wall.
Read the manufacturer before choosing equipment
The Vinyl Siding Institute and siding manufacturers commonly favor clear-water rinsing, soft cloths, or soft-bristle brushes with approved cleaners. Some manufacturers prohibit pressure washing; others allow it with limitations. Warranty exclusions can include harmful compounds, abnormal heat, oxidation, or negligent maintenance.
Use the instructions for the installed product. Confirm cleaner, dilution, brush, application direction, rinse, temperature, pressure allowance, and plant protection. Do not copy a household formula from another brand or combine cleaners.
Build a dry test, not a dramatic wet stripe
Choose a representative area that crosses stripe and field but is not the first thing seen from the street. Protect outlets, lights, meters, windows, doors, vents, cameras, plants, painted surfaces, masonry, and deck coatings.
- Rinse loose soil gently without aiming upward into laps.
- Apply the least aggressive approved solution to a manageable section.
- Keep within label dwell and prevent drying.
- Agitate evenly with a soft brush using light pressure.
- Rinse thoroughly in the direction accepted by the manufacturer, keeping flow away from openings.
- Let the siding and seams dry fully.
- Inspect color, gloss, chalk transfer, stripe contrast, lap edges, runoff, and adjacent materials.
A wet test hides chalk and deepens color. Approving it immediately is how a seemingly even wash becomes a dry patchwork the next day.
Keep water outside the drainage plane
A pressure-washer pump can supply low-force detergent or rinse, but the nozzle at the wall determines impact. Use a broad pattern, generous distance, and manufacturer-accepted force. Keep the stream level or directed down, never up beneath panel laps or into corner posts, J-channels, vents, soffits, windows, doors, electrical penetrations, or damaged areas.
Do not dwell over a stripe, trace laps, or use a zero-degree or rotating nozzle. Avoid spraying from a ladder where reaction force compromises balance. Wind can carry cleaner into open windows, neighboring property, vehicles, and landscaping.
Correct the source of recurring stripes
Inspect overflowing gutters, missing kickout flashing, roof runoff, corroding fasteners, dirty drip edges, irrigation, condensate, leaky sealants, and water paths from shutters or signs. Building-envelope repair may be required before another wash.
Do not caulk the bottom of every siding panel to stop a streak. That can block drainage and ventilation. Repairs must follow the siding and wall-system details.
Know when uniform cleaning is not available
If a mild approved test removes soil but the dry panel remains chalked, faded, or different from protected material, stronger cleaning may remove more weathered surface without restoring color. Options can include accepting normal weathering, manufacturer-approved coating preparation, selective replacement, or broader recladding. Color match with aged adjacent panels may still be imperfect.
Do not promise oxidation removal as restoration to new. Record the dry test, the transferable material, permanent color difference, damaged panels, source repairs, and warranty consultation.