How to clean storm windows and multi-track assemblies
Identify the exact panel system, label every component, remove and stage it by the manufacturer's sequence, clean without flooding tracks, and verify retention and movement after reassembly.
The hard part is often putting the right panel back
Storm-window systems create extra surfaces, narrow cavities, overlapping tracks, and small retention parts. They also vary widely. A removable exterior storm, an interior compression panel, a self-storing combination unit, a triple-track aluminum assembly, and a wood storm sash do not share one removal sequence.
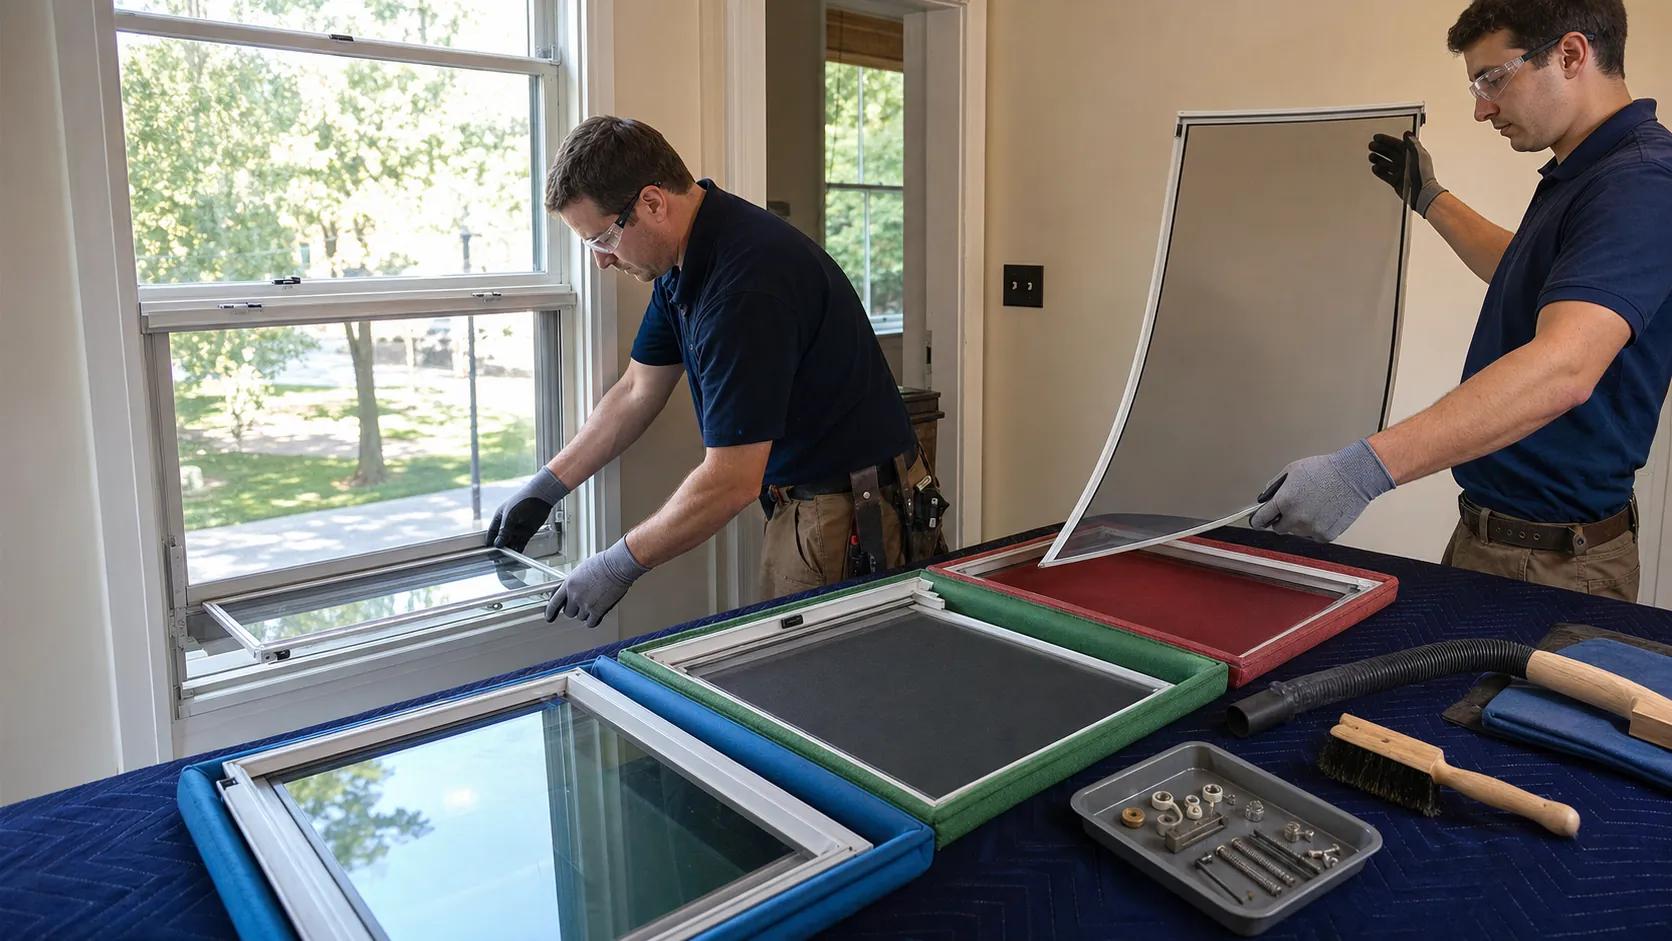
Before lifting anything, identify the product and obtain its current care or service instructions. If the exact manual cannot be found, document the hardware and ask a qualified window professional rather than forcing a part that resembles another model.
Survey one complete opening first
Choose a representative opening and examine it from both sides where access is safe. Record panel order, top and bottom orientation, indoor and outdoor face, track position, screen location, latches, spring plungers, wing blades, clips, hangers, interlocks, and drainage openings.
- Photograph the assembled unit and each corner in close view.
- Assign the opening a unique number or room and elevation code.
- Mark each removable panel and screen with a non-damaging label placed only on an approved frame edge or tag.
- Prepare a diagram for upper, lower, inner, middle, and outer positions.
- Record cracked glass, loose corners, bent rails, torn mesh, corrosion, missing retainers, and paint sealing a part in place.
Do not put adhesive on a coating, film, finished face, brittle gasket, or visible glass. A removable tag tied to an approved handle or a labeled padded rack slot may be safer.
Decide whether removal is appropriate
Large glass panels are flexible, awkward, and heavier than they appear. Exterior units may require ladder, scaffold, lift, or interior sash access. Evaluate fall protection, dropped-object exposure, wind, public separation, glass breakage, and the path to the staging area.
Use two people where panel size, flexibility, reach, or manufacturer instructions call for it. Wear task-appropriate cut protection and other required personal protective equipment. Never rely on suction cups unless they are rated, inspected, suitable for the surface, and used within a planned handling method.
Stop before removal when glass is cracked, a corner is separating, retention hardware is corroded or missing, the panel is painted or sealed into the opening, or the required access cannot be controlled. Cleaning does not justify turning a stable but defective unit into a falling panel.
Follow the product sequence without improvising
Some self-storing units require one sash to move past another before spring plungers can release. Other panels lift into a head pocket and swing out at the bottom. Interior storms may use clips, turn buttons, compression seals, magnets, or screws. The correct sequence also defines which side comes out first.
Support the panel continuously as each retainer releases. Do not twist flexible frames, pry against glass, bend wing blades, pull weatherstrip, or use a screwdriver as a substitute latch. Place released fasteners and small parts in a container labeled to the opening.
If a part resists, compare it with the manual and the opposite corner. Paint, corrosion, a loaded spring, frame distortion, or a hidden fastener can all feel like ordinary tightness. More force is not diagnostic.
Stage panels on a clean padded rack
Use stable, separated slots with soft clean contact points. Keep glass off concrete, soil, metal edges, and one another. Maintain the original orientation and protect the rack from traffic, wind, and overhead work. Do not stack panels flat where grit becomes trapped between them.
Inspect each edge before washing. A loose corner key, sharp burr, damaged glazing channel, or cracked lite should be isolated and documented. Screens need their own slots so bent frame corners and stretched mesh are not created by the glass load.
Clean dry cavities before adding water
Vacuum loose dust, insects, leaves, and grit from accessible tracks with a soft attachment. Brush toward collection instead of pushing debris into balance pockets, wall cavities, or weep channels. Protect interior finishes below the opening.
Use controlled moisture on frames and tracks. Flooding a sill can overwhelm small drainage paths or carry dirty water into wood and wall construction. Keep visible weeps free, but do not remove covers or probe concealed passages unless the manufacturer provides that service method.
Clean glass by its product guidance. Storm panels may be glass, acrylic, polycarbonate, coated, filmed, or treated with an unknown aftermarket product. Plastic glazing scratches more easily and may be damaged by cleaners or paper products that are acceptable on uncoated glass. Identify it before choosing tools.
Wash panels and screens as separate materials
| Component | Controlled method | Watch for |
|---|---|---|
| Glass storm panel | Soft clean applicator, compatible solution, complete extraction and edge drying | Loose glazing, edge chips, coating, film, sealant residue |
| Plastic glazing | Manufacturer-approved cleaner and nonabrasive cloth with ample clean liquid | Crazing, haze, scratches, solvent sensitivity |
| Screen | Support the frame, remove loose soil, wash gently, rinse without high pressure, dry upright | Torn mesh, loose spline, bent frame, fragile solar screen |
| Finished frame | Minimal compatible solution and prompt drying | Oxidation, paint transfer, exposed wood, corrosion |
| Hardware and retainers | Wipe clean and service only as instructed | Missing part, weak spring, cracked clip, incorrect screw |
Keep rinse water from one dirty panel off a finished panel below. Change cloths and solution when they pick up oxidized frame material. Let all components dry before returning them to a cavity with limited airflow.
Reinstall by identity, position, and engagement
Clean the receiving tracks and compare the label with the opening diagram. Install in the manufacturer's order. Keep the panel supported until every required hanger, clip, plunger, blade, or interlock is fully engaged. Reinstall only the correct hardware; a similar screw can have the wrong length or corrosion resistance.
- Verify panel orientation and track.
- Engage the specified upper or fixed retention point.
- Seat lower and side retainers without bowing the frame.
- Move each operating panel through its intended range.
- Confirm latches, screens, stops, drainage covers, and locks.
- Inspect from outside and inside for gaps, crossed tracks, pinched weatherstrip, or a loose corner.
Condensation between panels needs a location
Moisture on a room-side surface, inside the storm cavity, outdoors, or between sealed insulating panes has different causes. A storm panel changes airflow and surface temperatures, so some seasonal condensation in the inter-panel space may point to indoor air leakage or humidity rather than dirty glass.
Persistent water entry, blocked drainage, decayed wood, failed seals, or fog trapped inside an insulating unit requires building or window service. Do not seal drainage openings in an attempt to keep the cavity dry.
A professional window-cleaning scope should count each accessible surface and include panel handling time, staging, condition exceptions, and reinstallation checks. The extra work is not just two more pieces of glass; it is preserving the order and function of the assembly.