Interior window cleaning in a finished home
Protect floors, wood, walls, furniture, electronics, treatments, grilles, screens, hardware, pets, and occupants while controlling solution and documenting window defects.
The glass is rarely the most expensive surface in the room
Interior window cleaning happens beside finished wood, painted drywall, wallpaper, stone sills, carpet, electronics, furniture, curtains, artwork, and hardware. A few ounces of uncontrolled solution can reach materials that were never part of the cleaning scope. Preparation should be designed around the room, not just the pane.
Walk the room with the occupant
Confirm which windows, doors, interior storm panels, skylights, mirrors, and partitions are included. Identify fragile objects, alarm contacts, motorized shades, accessible outlets, floor vents, pets, children, work areas, and rooms that must stay private. Agree on who moves valuable or irreplaceable objects.
Photograph existing glass scratches, failed seals, cracked paint, water stains, loose trim, damaged screens, swollen wood, corroded hardware, and broken sash parts. Condensation between panes, active leakage, mold, and finish failure are not ordinary glass soil. Document and route them to the right scope.
Read the window before operating it
Identify the manufacturer and product line when possible. Casement, awning, single-hung, double-hung, tilt, slider, removable interior panel, and fixed units have different cleaning access. Follow the product procedure for locks, limit devices, balances, wash assists, hinges, screens, and grilles.
Do not force a sash that binds or disengage a tilt mechanism without controlling its weight. Never stand on a sill, furniture, or an improvised platform. A window that cannot be accessed from a stable approved position needs another method.
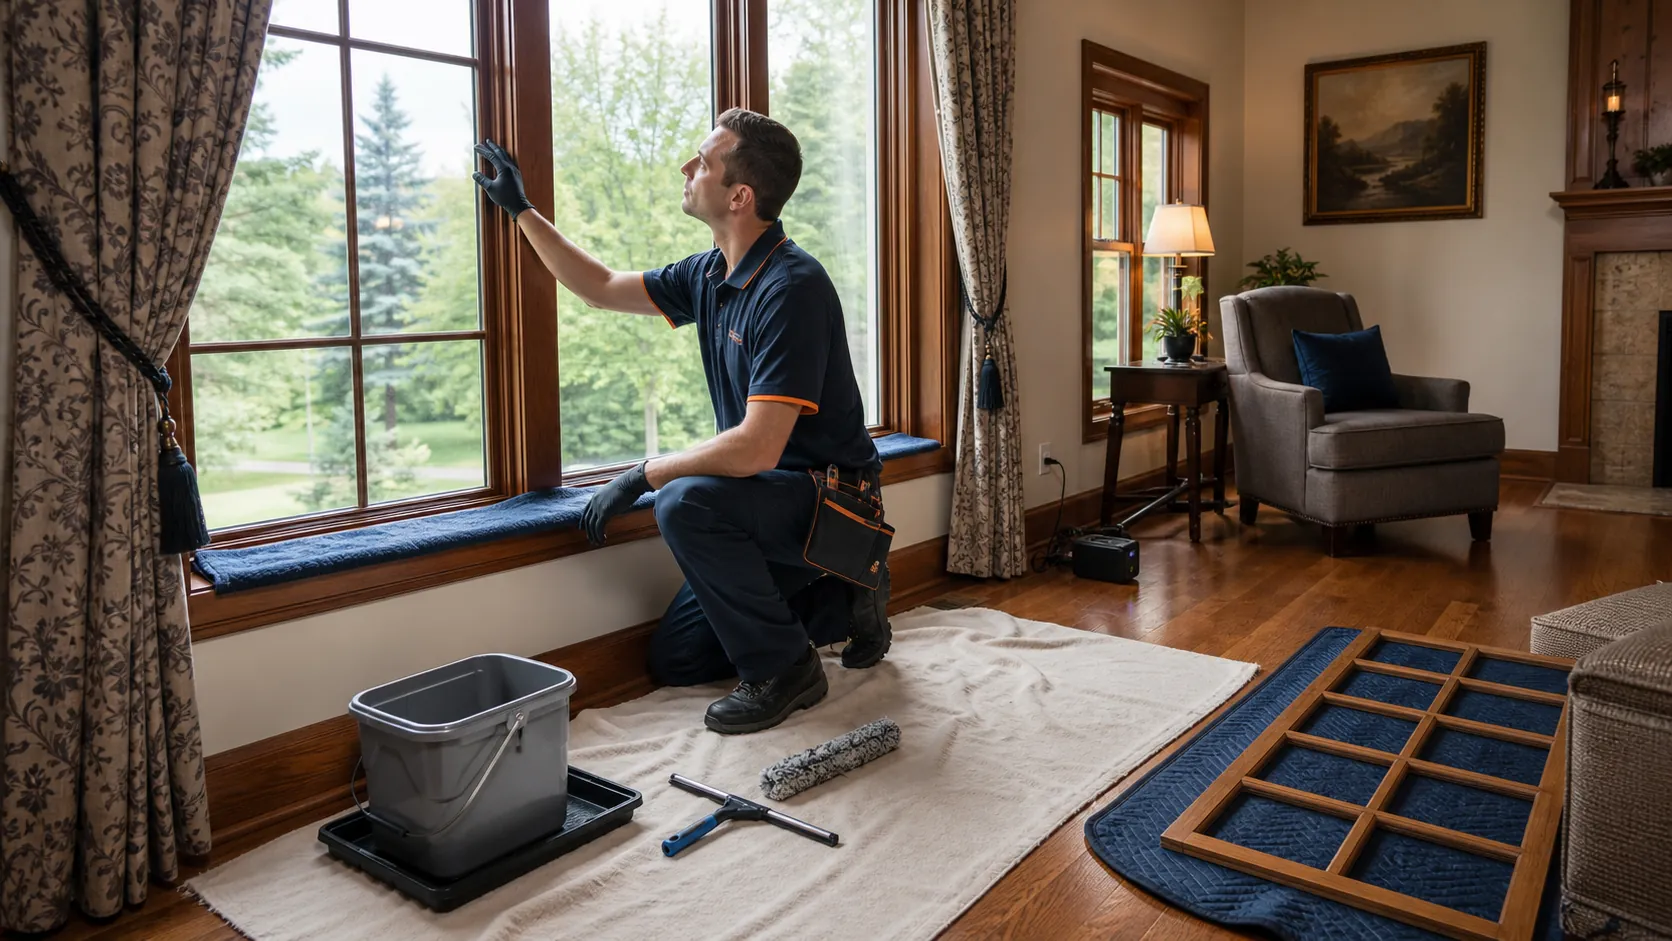
Build a small protected work cell
- Move furniture far enough for stable stance and tool control.
- Tie back treatments without creasing, staining, or pulling their hardware.
- Cover the sill with a clean absorbent barrier that will not transfer dye.
- Protect the floor with a clean drop cloth appropriate to wood, stone, carpet, or resilient flooring.
- Place the bucket in a stable waterproof tray, not directly on the finish.
- Keep tools on a clean pad and route cords or hoses outside the walking path.
- Keep electronics, chargers, and portable devices outside the wet zone.
Protection should not create a new trip hazard or trap liquid against wood. Check under the sill cloth during the work and replace it when damp.
Remove only components designed to be removed
Label removable grilles, screens, and inserts by opening when several look alike. Release clips in the sequence specified by the manufacturer. Support long or flexible pieces with both hands. Place them flat on a padded clean area away from foot traffic.
Do not pry with a metal blade, bend spring clips, or stack a wet screen against finished walls. Clean screens separately and let retractable products dry as directed before returning them to their housing. If a component resists, stop and identify the mechanism.
Use controlled solution, not airborne spray
Apply a measured compatible solution to the scrubber or cloth rather than misting the room. Avoid overspray on wood, wall paint, stone, fabric, electronics, and hardware. A small applicator and narrow squeegee often provide better control on divided panes than a full-size wet tool.
Keep the working solution clean. Interior soil can include cooking film, nicotine, candle residue, fingerprints, aerosol products, and dust. Change water and sleeves rather than redistributing an oily load. Identify adhesive, paint, silicone, or mineral spots before choosing a stronger chemical.
Separate glass from frame care
| Material | Control |
|---|---|
| Finished or unfinished wood | Use the window maker's product guidance, limit moisture, and dry immediately |
| Vinyl, composite, fiberglass, or clad frame | Use compatible mild cleaning and avoid abrasive or caustic products |
| Anodized or specialty metal | Protect from strong chemistry and tools that alter the finish |
| Exposed interior glass coating or film | Use only the approved soft tools and chemistry; no default blade work |
| Hardware and weatherstripping | Keep clean without removing lubricant or soaking mechanisms |
Manufacturer-specific instructions control. For example, certain exposed interior performance coatings may require only mild soapy water. A process safe for ordinary bare glass can damage that surface.
Work top to bottom within the protected cell
Dry dust the frame and accessible ledges with the approved tool before wetting the pane. Wet the glass without flooding the top rail. Agitate the perimeter and center, then squeegee with overlapping passes. Capture water at the lower edge and detail only the narrow perimeter with a clean lint-free cloth.
Inspect for solution entering a glazing pocket, wood joint, screen channel, alarm contact, or wall cavity. Stop and dry it immediately. Do not let dirty towels accumulate on flooring or furniture.
Reset the window as carefully as it was opened
When all parts are dry, reinstall the correct grille, screen, or panel by its product procedure. Confirm clips are seated, locks engage, sash movement is normal, treatments operate, and no tool or protection remains. Never lubricate hardware unless the maintenance instruction identifies the lubricant and location.
Inspect the glass dry from normal room positions. Check the sill and floor with clean dry hands or an appropriate moisture check. Review any pre-existing or newly discovered condition with the occupant before moving to the next room.
A practical room checklist
- Scope and access agreed
- Existing defects photographed
- People, pets, privacy, and alarms controlled
- Floor, sill, wall, furniture, and electronics protected
- Window operation and removable parts identified
- Glass, frame, coating, film, and hardware methods separated
- Components returned, locks tested, room reset
- Dry result and surrounding finishes checked
Professional interior window cleaning is quiet work. The best evidence is a clear pane and a room returned exactly as it was, apart from documented conditions the cleaning revealed.